Ally Character Movement and Actions Table of Contents
Overview
Ally character control follows the flow: character selection → movement → action.
First, position the map cursor over any ally and press the Z key to display their movement range.
Pressing the Z key again within the movement range will move them to that position.
After movement, the action menu will appear.
Action Menu
Action Menu Window
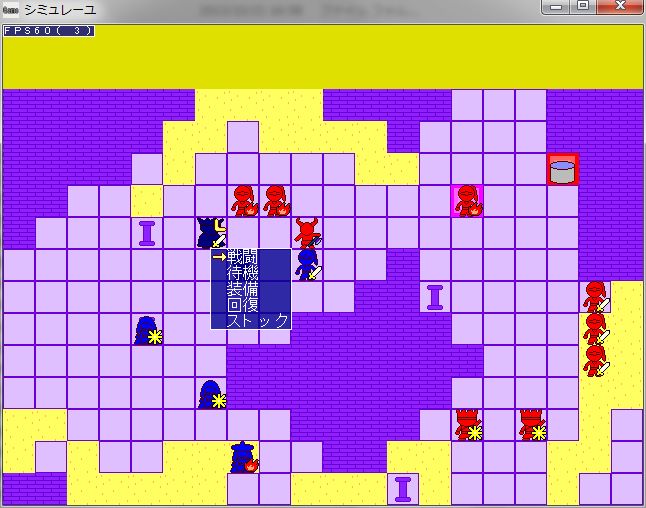
The action menu appears after an ally’s movement.
Each command is explained below.
● Combat
This command appears when adjacent to an enemy.
Initiates 1-on-1 combat with the selected adjacent enemy.
Regardless of combat mode or learned skills, you cannot initiate combat with enemies more than 2 squares away.
In auto-battle, you select the skill to use in combat.
For details on combat, refer to “Combat System”.
● Wait
In manual combat, ends the action without doing anything.
In auto-battle, selects skills to equip for the next battle.
● Equip
Only effective in auto-battle.
Selects skills to equip for the next battle.
Unlike “Wait,” this does not end the action, so for example, if you want to heal with “Skill” but also change equipment, you can execute “Equip” → “Skill” in one turn.
● Skill
Uses skills learned by the character on the stage map.
Only healing skills can be used.
Can only be used on yourself or adjacent characters.
● Stock
Uses skills from stock on the stage map.
Only healing skills can be used.
Can only be used on yourself or adjacent characters.
● Special Command (Other)
Special commands are commands that appear depending on events occurring on the stage map.
The content of command execution also varies by event.
For example, stopping on a square with a house and selecting “Visit” might allow you to hear a story, or stopping on a square with a treasure chest and selecting “Open” might allow you to acquire a skill.