Event Placement Table of Contents
Placing Events
An event is something that happens in the game, such as conversations with allies or enemies, enemy reinforcements, or acquiring treasure chests.
To place events, first switch the palette mode to Event Palette.
From the main menu, select “Edit” > “Change Palette” > “Event”.
Then the following window will be displayed.
Event Palette Window

To place an event, click on the event you want from the event list.
Then click on the stage map to place the selected event at the cursor’s position, or place it after editing (depending on settings).
Also, right-clicking on the stage map will bring up the following menu:
Event Right-Click Menu Window
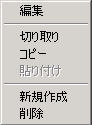
● Edit
Edits the selected event.
● Cut / Copy / Paste
Performs cut, copy, and paste operations on the selected event.
You can also copy an event from the stage map and paste that data onto the event palette.
● Create New
Creates a new event.
Regardless of which data is selected in the event palette window, the event will be default (minimal) data.
● Delete
Deletes the selected event.
About Event Palette
The event palette is a template for event data.
Event data can be edited in the event palette window, or after placing the event on the stage.
However, since the event palette is merely a template, editing the palette data after placing an event on the stage will not be reflected in the placed data.
The event palette is shared across all stages, so creating frequently placed events in the event palette will increase development efficiency.
※In the previous work, the event palette was not shared across all stages; it was independent for each stage.
Next, the settings for the event palette window will be explained.
Event Palette Window
● Edit if placed
When placing an event, if an event already exists at the cursor position, whether to edit the existing event instead of placing a new one.
● Edit immediately before placement
When placing an event, whether to edit the event before placing it.
The “Insert”, “Edit”, “Delete”, and “Data Count” buttons below that are for editing the event list.
Editing Event Data
Clicking the “Insert” or “Edit” button in the event palette window will open a window for editing event data.
Event Data Window
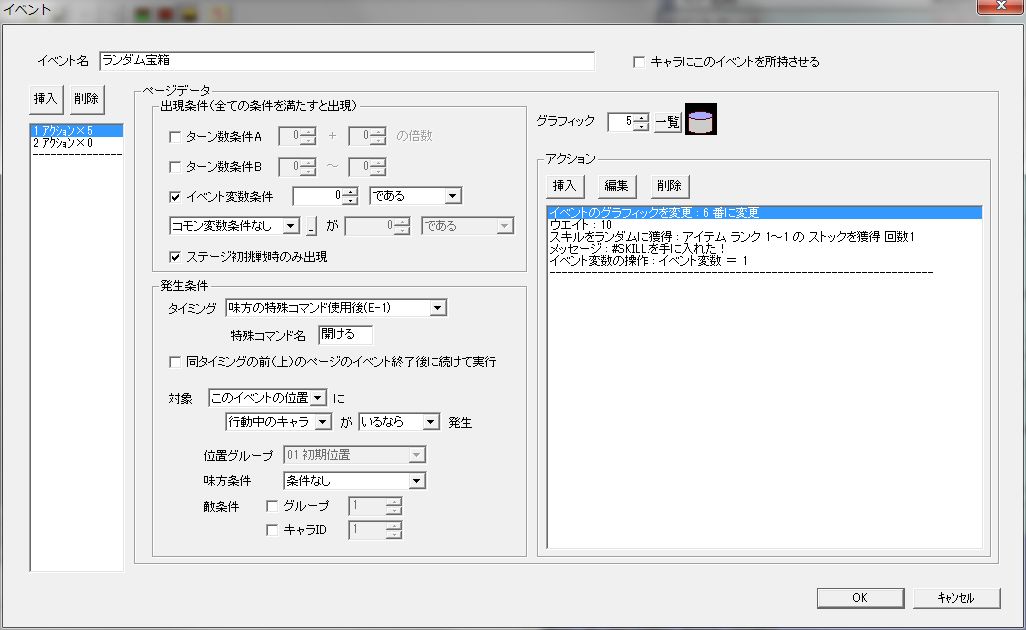
Explanation of each setting item.
● Event Name
The name of the event.
It will not be displayed in the game, so it can be used as a memo.
● Make character possess this event
Whether to make the character in the same square as the event possess the event.
If the character possesses the event, the event’s position will move with the event possessor’s movement.
Also, in the event occurrence condition “Timing”, the possessor’s state can be used as a condition, and some event actions can target the possessor.
● Page List
The list on the left side of the window is the event page list.
The “Appearance Condition”, “Occurrence Condition”, “Graphic”, and “Action” explained after this page list are collectively called a page (event page), and one event can have multiple pages.
When an event has multiple pages, clicking on any page in this page list will switch to that page.
The “Insert” and “Delete” buttons at the top of the page list are for editing the page list.
● Appearance Condition (Frame)
Conditions for the event to appear.
If this condition is met, the “Graphic” will at least be displayed.
If the appearance conditions for multiple pages are met, only the page with the smallest page number (the page at the very top of the page list) will be displayed.
Explanation of each setting item in the “Appearance Condition” frame.
○ Turn Count Condition A
Set in the format: “[Base Value] + Multiples of [Multiplier]”.
Effective when you want an event to occur on specific turns.
If [Base Value] is 0, it’s the same as having no condition based on turn count.
You can also specify multiples.
If “1” + multiples of “3”, the condition will be met on turns 1, 4 (1+3), 7 (1+6), 10 (1+9)…
○ Turn Count Condition B
Set in the format: “[Min Value] ~ [Max Value]”.
This allows you to specify a range of turns for the event to occur.
Please make sure [Min Value] is smaller than [Max Value].
○ Event Variable Condition
Set in the format: “[Value] [Evaluation Method]”.
Event variables are independent variables provided one for each event.
Event variables are always initialized to 0 before the stage starts.
By changing event variables with the event action “Manipulate Event Variable” and creating conditional branches here, you can create complex events.
○ Common Variable Condition
Common variables are set in the format: “[Common Variable] is [Value] [Evaluation Method]”.
Unlike event variables, common variables are not set to 0 before the stage starts, and can be referenced and manipulated from any stage.
By changing common variables with the event action “Manipulate Common Variable” and creating conditional branches here, you can create complex events.
However, there are limits to the number of common variables and they can be difficult to manage, so for simple events like treasure chests (as seen in the default event palette), it’s generally better to use event variables than common variables.
For example, the sample game “Simulayu” uses only 11 common variables.
○ Appear only on first stage challenge
Whether the event appears only on the first stage challenge.
If this is checked, it will not appear on subsequent replays after clearing the stage.
● Occurrence Condition (Frame)
Conditions for the event to occur.
What you need to be careful of here is that even if “Occurrence Condition” is met, the event will not occur if “Appearance Condition” is not met.
If the appearance condition is not met, the occurrence condition is not even checked.
If multiple pages within one event meet the occurrence conditions and have the same “Timing”, only the page with the lowest page number will cause the event to occur.
If multiple pages within one event meet the occurrence conditions and have different “Timings”, the events from all those pages will occur at their respective timings.
Explanation of each setting item in the “Occurrence Condition” frame.
○ Timing
When the event occurs.
There are a total of 23 types of timings.
・After ally’s turn starts (B-1)
・Before ally’s turn ends (C-1)
・After ally’s action ends (D-1)
・After ally uses special command (E-1) … When conditions other than “Timing” are met, an event command is added to the ally’s action menu. Executing that command triggers the event. (Command name can be set in separate item “Special Command Name”).
・After enemy’s turn starts (B-1)
・Before enemy’s turn ends (C-1)
・After enemy’s action ends (D-1)
・After ally or enemy’s turn starts (B-2)
・Before ally or enemy’s turn ends (C-2)
・After ally or enemy’s action ends (D-2)
・Before combat starts (F-1)
・After combat ends (G-1)
・After ally wins combat (G-4)
・After ally loses combat (G-4)
・After leader loses combat (G-3)
・After possessor’s action ends (D-3) … “Possessor” refers to the possessor of this event.
・After possessor uses special command (E-2)
・Before possessor’s combat starts (F-2)
・After possessor’s combat ends (G-2)
・After possessor’s combat ally wins (G-5)
・After possessor’s combat ally loses (G-5)
・Before stage start (A) … Event occurs before the preparation menu before stage start appears.
・Before stage clear (H)
Explains the order of event occurrence based on timing.
Supposing there are two events on the stage (or one event with two pages), even if their timings are “After ally’s turn starts” and “Before ally’s turn ends”, there will likely be no confusion. However, if they are, for example, “After combat ends” and “After ally wins combat”, or “After ally’s action ends” and “After possessor’s action ends”, you might want to know which event executes first.
Actually, all timings have a predetermined execution order, which can be identified by the “alphabet-number” (e.g., “B-1”) listed after the timing name.
The alphabet represents the timing group for event occurrence.
The number after the hyphen represents the execution order within the same alphabet group.
For example, between “After combat ends (G-1)” and “After ally wins combat (G-4)”, the event with the smaller value, “After combat ends”, will occur first.
However, if multiple events have the same timing, such as Event A “After combat ends (G-1)” and Event B “After combat ends (G-1)”, their execution order is not guaranteed.
Either ensure that events with the same timing do not occur simultaneously, or create events that are not affected by their execution order.
Note that in the previous work and versions 2.51β and earlier, “After ally uses special command” and “After possessor uses special command” had design flaws such as not being able to display multiple special commands in the action menu, but these were resolved in 2.52β.
Multiple special commands can now be displayed at once, and events corresponding to each special command execute without problems.
However, it is a specification that if too many special commands are displayed at once, they will not fit on the screen.
● Graphic
The graphic of the event.
In the game, the background (black) will not be displayed.
● Action (Frame)
Action refers to the content of an event’s execution, also called event action.
When “Appearance Condition” and “Occurrence Condition” are met and the “Timing” comes, actions are executed in order from the top of the action list.
The “Insert”, “Edit”, and “Delete” buttons above the action list are for editing the action list.
The “Insert” button creates a new action and adds it to the list.
For explanations of each action, refer to “Event Actions”.